To clear username from terminal in linux simply add the following to the end of your ~/.bashrc file, then logout and login!
export PS1="\W \$ "
Solves : How to hide computer name and user name in terminal
To clear username from terminal in linux simply add the following to the end of your ~/.bashrc file, then logout and login!
export PS1="\W \$ "
Solves : How to hide computer name and user name in terminal
Install nvidia-docker on proxmox with this easy guide.
Remove the blacklist from /etc/modprobe.d/pve-blacklist.conf by commenting out "nvidiafb"

Add "non-free" to /etc/apt/sources.list
deb http://ftp.us.debian.org/debian buster main contrib non-free

apt-get update
apt-get install nvidia-driver nvidia-smi

Reboot!

apt-get update ; apt-get install docker.io docker-compose
curl -s -L https://nvidia.github.io/nvidia-docker/gpgkey | \
apt-key add -
distribution=$(. /etc/os-release;echo $ID$VERSION_ID)
curl -s -L https://nvidia.github.io/nvidia-docker/$distribution/nvidia-docker.list | \
tee /etc/apt/sources.list.d/nvidia-docker.list
apt-get update ; apt-get install nvidia-docker2
vm is locked is common issue in proxmox that is solved with a simple command to the vm on the command line
qm list
qm unlock $VMID
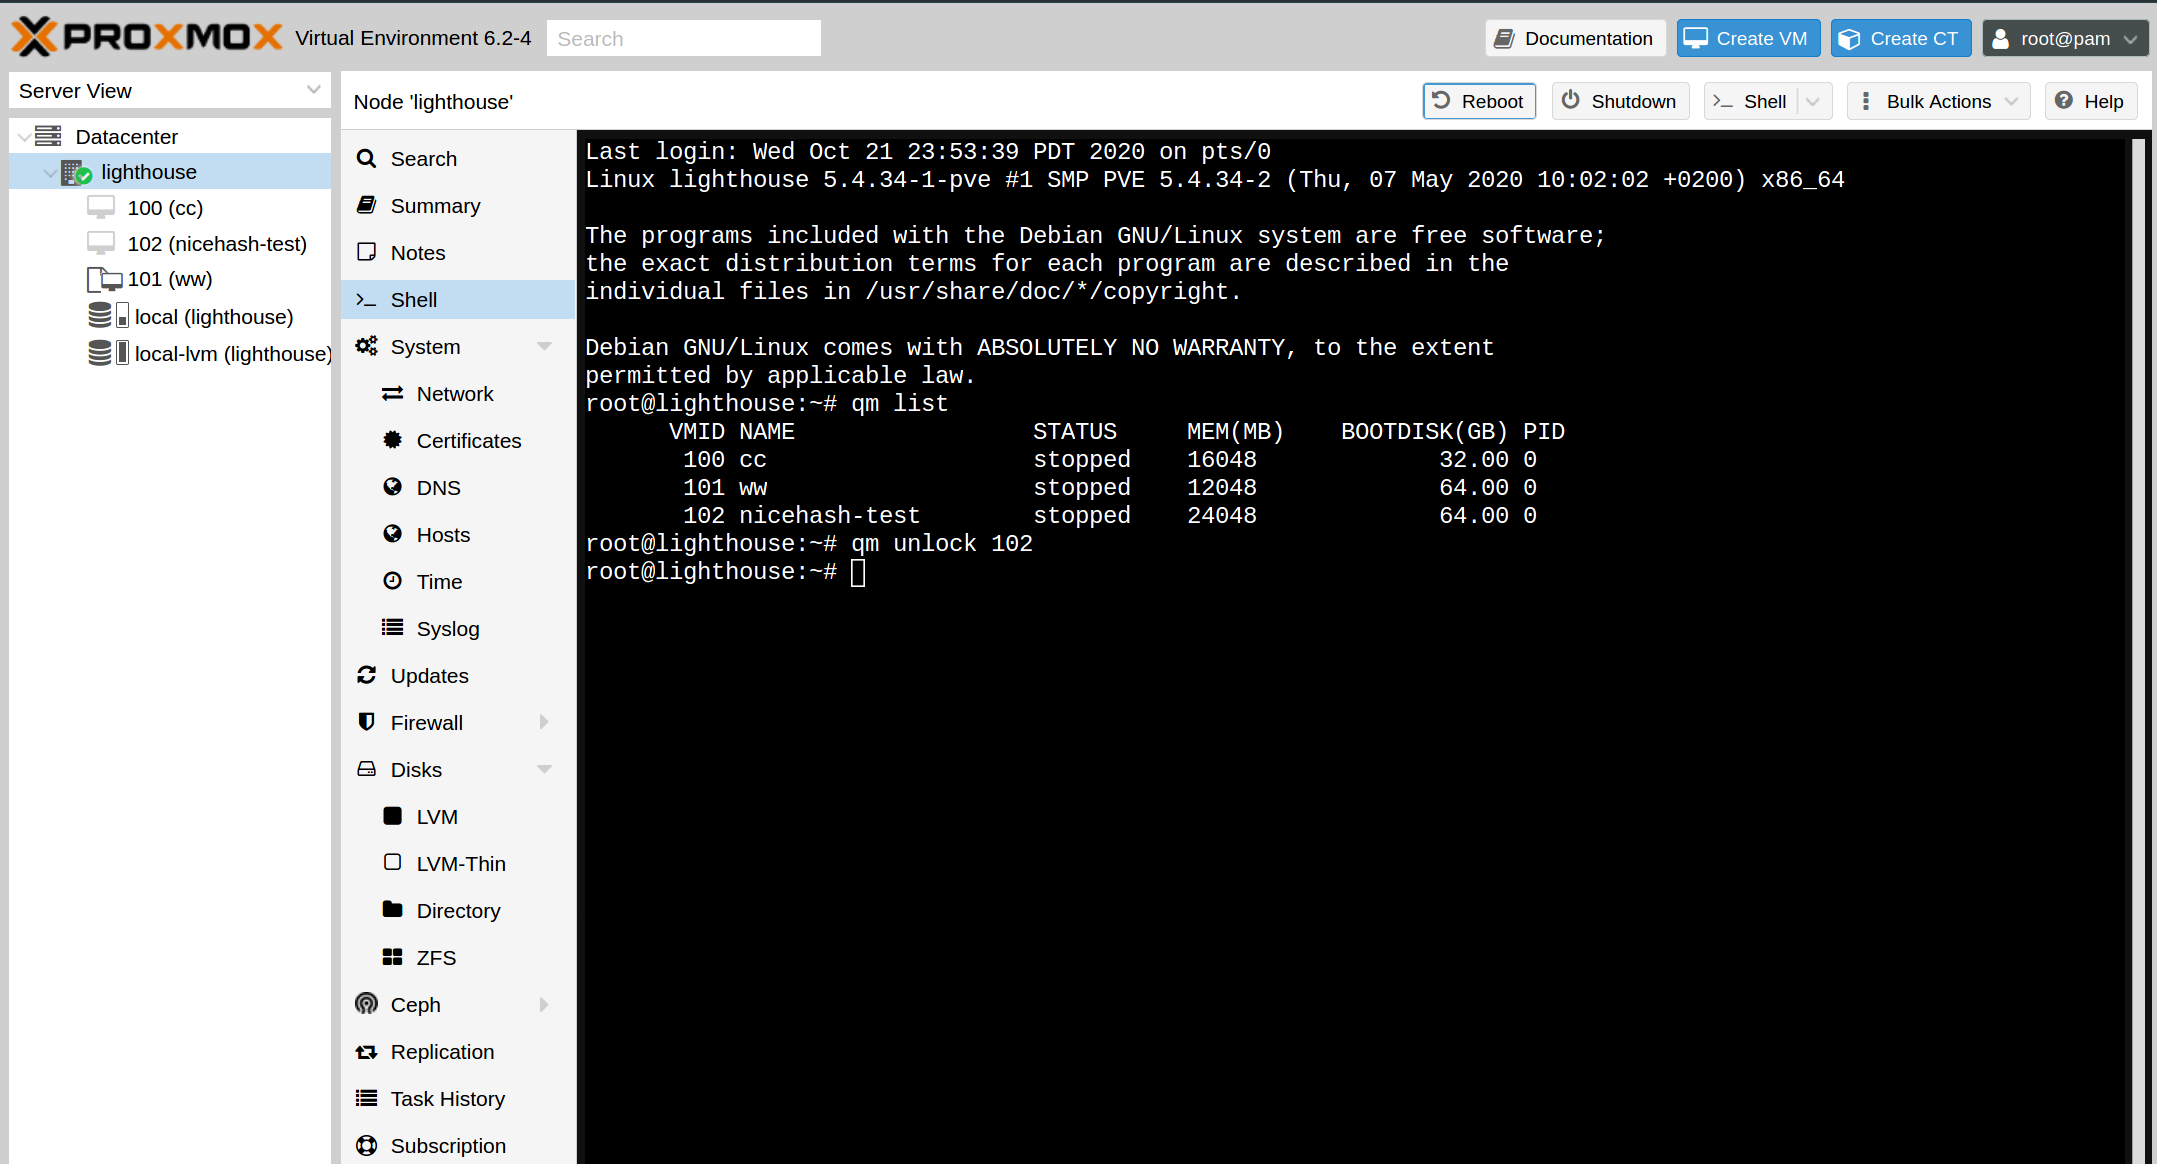
Solves : container is locked proxmox
unlock container proxmox
unlock vm proxmox
vm unlock proxmox
The best tool for a ramdisk on linux is simply adding the following line to your /etc/fstab. Create the new mount directory first of course.
mkdir -p /mnt/ramdisk
sudo echo "tmpfs           /mnt/ramdisk tmpfs      defaults,size=8192M 0 0" >> /etc/fstab
sudo mount -a
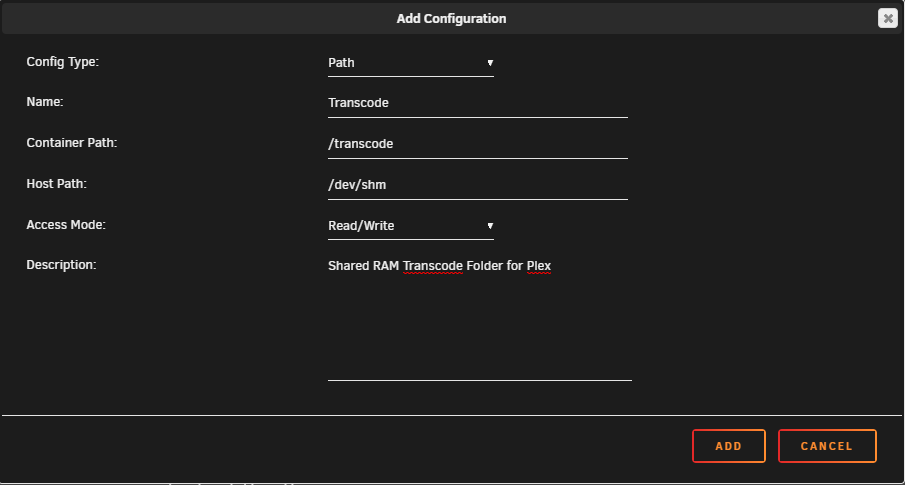
Unraid has a built-in shared RAM disk accessible under the /dev/shm folder. This shared RAM disk defaults to half of the total system memory
https://forums.serverbuilds.net/t/guide-plex-transcoding-and-ram-disks/625
The easiest way to set the power limit permanently in ubutu with an nvidia graphics card is as follows.
#!/bin/bash
sudo nvidia-smi -pm 1
sudo nvidia-smi -pl 150 -i 0
If you’re tired of paying for a DigitalOcean droplet and want to save money, you can migrate your droplet to an Unraid VM using this simple guide. By running your VPS locally, you could save hundreds or thousands of dollars a year. Here are the steps to follow:
Step 1: Set a Root Password for VNC
Before you start the migration, it’s important to set a root password for VNC. To do this, follow these steps:
Step 2: Copy the Remote Disk Image of the DigitalOcean Droplet to Your Local Machine
Next, you need to copy the remote disk image of the DigitalOcean droplet to your local machine. You can do this with the following command:
ssh root@43.44.X.X "dd if=/dev/vda" | sudo dd of=88plug.raw bs=64k
This command will create a raw disk image of your DigitalOcean droplet and save it to a file called 88plug.raw on your local machine.
Step 3: Convert the Raw File to a Compatible IMG File for Unraid
After copying the disk image to your local machine, you need to convert it to a compatible img file for Unraid. You can do this with the following command:
qemu-img convert -p -O raw 88plug.raw disk.img
This command will create a disk image file called disk.img that is compatible with Unraid.
Step 4: Sync the Image File to Unraid
Next, you need to synchronize the disk image file to your Unraid server. You can use the following command to do this:
rsync -av --progress -e "ssh -T -c aes128-ctr -o Compression=no -x" disk.img root@tower.local:/mnt/user/domains/88plug/
This command will copy the disk image file to your Unraid server and save it to /mnt/user/domains/88plug/ the directory.
Step 5: Create a New VM with the Same OS as Your DO Droplet
Finally, you need to create a new virtual machine in Unraid with the same operating system as your DigitalOcean droplet. You can do this using the Unraid web interface or command line interface, and you’ll need to import the disk image file you created in Step 3. Here’s an example command to import the disk:
qm importdisk $VMID disk.img local-lvm
And to confirm the VM is created, you can list all available VMs with:
qm list
Bonus round: For other systems use the handy table below
| Image format | Argument to qemu-img |
|---|---|
| QCOW2 (KVM, Xen) | qcow2 |
| QED (KVM) | qed |
| raw | raw |
| VDI (VirtualBox) | vdi |
| VHD (Hyper-V) | vpc |
| VMDK (VMware) | vmdk |
Bonus Round: Convert Raw to QCOW2 for Proxmox
If you’re using Proxmox, you’ll need to convert the raw file to a QCOW2 file format. You can do this with the following command:
qemu-img convert -p -O raw 88plug.raw disk.qcow2
So you’ve finally installed ProxMox, now what?!
wget https://raw.githubusercontent.com/extremeshok/xshok-proxmox/master/install-post.sh -c -O install-post.sh && bash install-post.sh && rm install-post.sh
The easiest way to wipe a filesystem including any pesky disk signatures. This can be very useful for preparing a drive for Windows 10 or ZFS arrays.
sudo wipefs --all --force /dev/vdx
Features Include
Step 1 : Add the Gnome Firefox Plugin as prompted at the top of the page
Step 2: Click “On” button here
To enable gnome for proxmox the process is very simple. First setup proxmox, and then run the following shell commands in proxmox
tasksel install desktop gnome-desktop
#Then enable gnome on startup
sudo systemctl set-default graphical.target
#Now disable gdm-password for root login check
sed -i 's/.*pam_succeed_if/#&/' /etc/pam.d/gdm-password
reboot
#Now login with console !
Using tasksel is the fastest way to install gnome on debian.
sudo tasksel install desktop gnome-desktop
#Then enable gnome on startup
sudo systemctl set-default graphical.target
Limit cpu and memory of all running docker containers
docker update --cpus 0.5 $(docker ps -qa) ; docker update -m 512M --memory-swap -1 $(docker ps -qa)
Get coloured terminal over ssh
cp /etc/skel/.bashrc ~/.bashrc
sed -i ‘s/#force_color_prompt=yes/force_color_prompt=yes/g’ ~/.bashrc
source ~/.bashrc
Solve for x on the command line with this linux utility. The best program to solve for X on the command line is called “qalc”.
apt-get install qalc
qalc -t "x*0.00000019=0.0005" | awk '{print $3}'
Fixes /usr/lib/libnvidia-gtk3.so.440.33.01: undefined symbol: gtk_widget_hide_on_delete
Step 1 : Check nvidia-smi for version first
Step 2: Locate nvidia-settings with same version as Step 1 at https://developer.download.nvidia.com/compute/cuda/repos/ubuntu1604/x86_64/ and download with wget to your system.
Step 3: Follow steps below replacing XXX with the version you downloaded.
sudo apt-get remove nvidia-modprobe nvidia-settings
sudo dpkg -i nvidia-settings_XXX.deb
sudo reboot now
Use Manjaro linux as a headless server.
https://github.com/88plug/manjaro-headless
Upload the Manjaro Minimal with XFCE ISO to Vultr or your hosting provider/server and use host Console to install with default options.
https://osdn.net/dl/manjaro/manjaro-xfce-18.1.5-minimal-191229-linux54.iso.torrent
Run the automated installer
git clone https://github.com/88plug/manjaro-headless ; cd manjaro-headless ; sudo ./run.sh
Fixes systemd-resolved[356]: Server returned error NXDOMAIN, mitigating potential DNS violation DVE-2018-0001, retrying transaction with reduced feature level UDP.
ln -fs /run/systemd/resolve/resolv.conf /etc/resolv.conf
The symlink on various VPS providers in incorrectly set. So this command updates the symlink to /run/systemd/resolve/resolv.conf
To easily cleanup disk space from mariadb cluster, purge the binary log in a mariadb cluster.
PURGE BINARY LOGS BEFORE (NOW() - INTERVAL 18 HOUR);
ping and get ip only bash
getent ahostsv4 wildvm.local | awk '{print $1}' | head -1