sudo apt-get update
sudo apt-get install sublime-text-installer
[/raw]
This guide will teach you how to install ccminer sp-hash on Ubuntu 16.04
You must first run Install NVIDIA Driver and CUDA on Ubuntu 16.04 before proceeding.
[raw] #!/bin/bashTo buy a pre-compiled Dockerfile with this image check my selection of miner friendly Dockerfiles at https://docker.cryptoandcoffee.com
This guide will teach you how to install ccminer tpruvot on Ubuntu 16.04
You must first run Install NVIDIA Driver and CUDA on Ubuntu 16.04 before proceeding.
[raw] #!/bin/bashTo buy a pre-compiled Docker container with this image compatible with NVIDIA GPU’s check my selection of miner friendly Docker containers at https://cryptoandcoffee.com
This guide will teach you how to install ccminer alexis78 on Ubuntu 16.04
You must first run Install NVIDIA Driver and CUDA on Ubuntu 16.04 before proceeding.
[raw] mkdir alexis78To buy a pre-compiled Dockerfile with this image check my selection of miner friendly Dockerfiles at https://docker.cryptoandcoffee.com
Install Claymore Dual Miner Ethereum Decred Siacoin Lbry Pascal on Ubuntu 16.04
Thanks be to https://litecointalk.io/t/litecoin-compilation-guide/3039
The fastest algorithm to mine on NVIDIA is by far Skein. This fork of ccminer from Klaust is definitely the fastest build of ccminer I have found to mine Skein on NVIDIA CUDA.
You must first run Install NVIDIA Driver and CUDA on Ubuntu 16.04 before proceeding.
[raw] #!/bin/bashTo buy a pre-compiled Dockerfile with this image check my selection of miner friendly Dockerfiles at https://docker.cryptoandcoffee.com
Configuration and Installation of CoiniumServ can be found here : https://github.com/bonesoul/CoiniumServ/wiki/Configuration
These instructions are to Install NVIDIA Driver and CUDA on Ubuntu 16.04.
This issue can be safely ignored as detailed here: https://github.com/meteor/meteor/issues/8592
Adding 10 gigabit ethernet networking to your hackintosh is now extremely easy. You simply need to add these three kexts to your EFI/CLOVER/KEXTS/OTHER folder and you will have a working card! This method works so far on the following cards:
Supported devices for SmallTreeIntel8254x.kext:
SmallTreeIntel82576.kext:
SmallTreeIntel8259x.kext:

The team at Brave have done an amazing job with the release of their Chrome-based browser, Brave. The browser can be used on all operating systems, and don’t forget to install on your mobile devices – since the bandwidth saving ad-block features really shine on cellular connections.
There’s a new ad game in town. It’s called “Malvertising”. The latest display ad technology can install malware on your laptop without your knowledge. But not with Brave watching your back.
We’ve integrated HTTPS Everywhere into every Brave browser to make sure you are always moving your bits across the safest possible pipe.
Do you ever get that feeling that someone is watching you when you see an ad for something you bought a few days ago? We make sure you aren’t being tracked while you shop online and browse your favorite sites.
A common error with 10.03-10.05 of FreeNAS Corral is “scanning for existing boot pools” which occurs during installation. The easiest way around this is to use 10.0.2 and then update.

The latest release of FreeNAS Corral is BROKEN and will not install. The error is “scanning for existing boot pools”
The best way around this is to install 10.0.2 and then update! The installers from 10.0.3-10.0.5 are broken at this time.
FreeNAS.org = Download 10.0.2 ISO
This adblock script for the Ubiquiti ERL3 router has been updated to include some of the largest adblock lists around.
I have updated the original file recommended by Ubiquiti to contain more lists. See Pi-Hole.
Login to your ERL3 and edit /config/user-data/update-adblock-dnsmasq.sh
https://gist.github.com/OnlyInAmerica/75e200886e02e7562fa1
If you encounter errors restarting DNSMasq – check [raw]tail -f messages -n1000[/raw]
Unfortunately you /boot partition must still use ext3! There is no support with the minimal install of centos 6.3 with grub bootloader version 0.97 for ext4. Buyer beware!

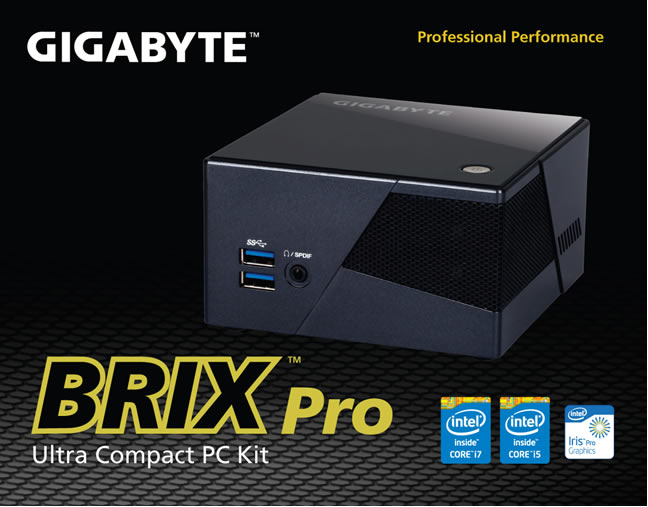
Gigabyte Brix Pro Hackintosh Guide OS X Sierra Clover
Step 1. Create USB Installer
Step 2. Install Clover to USB
Step 3. Add Motherboard Specific Kexts
Step 4. Update config.plist
We need to add the “ig-platform-id” to config.plist so that the Video driver is injected automatically.
ig-platform-id
0x0d220003
Step 5. Additional Notes – Audio.
To prepare the Brix for Audio, let’s first mount the EFI partition with Clover Configurator
For Audio, the easiest solution (since Brix is quite old now) is to run Audio_ALCinjection.command